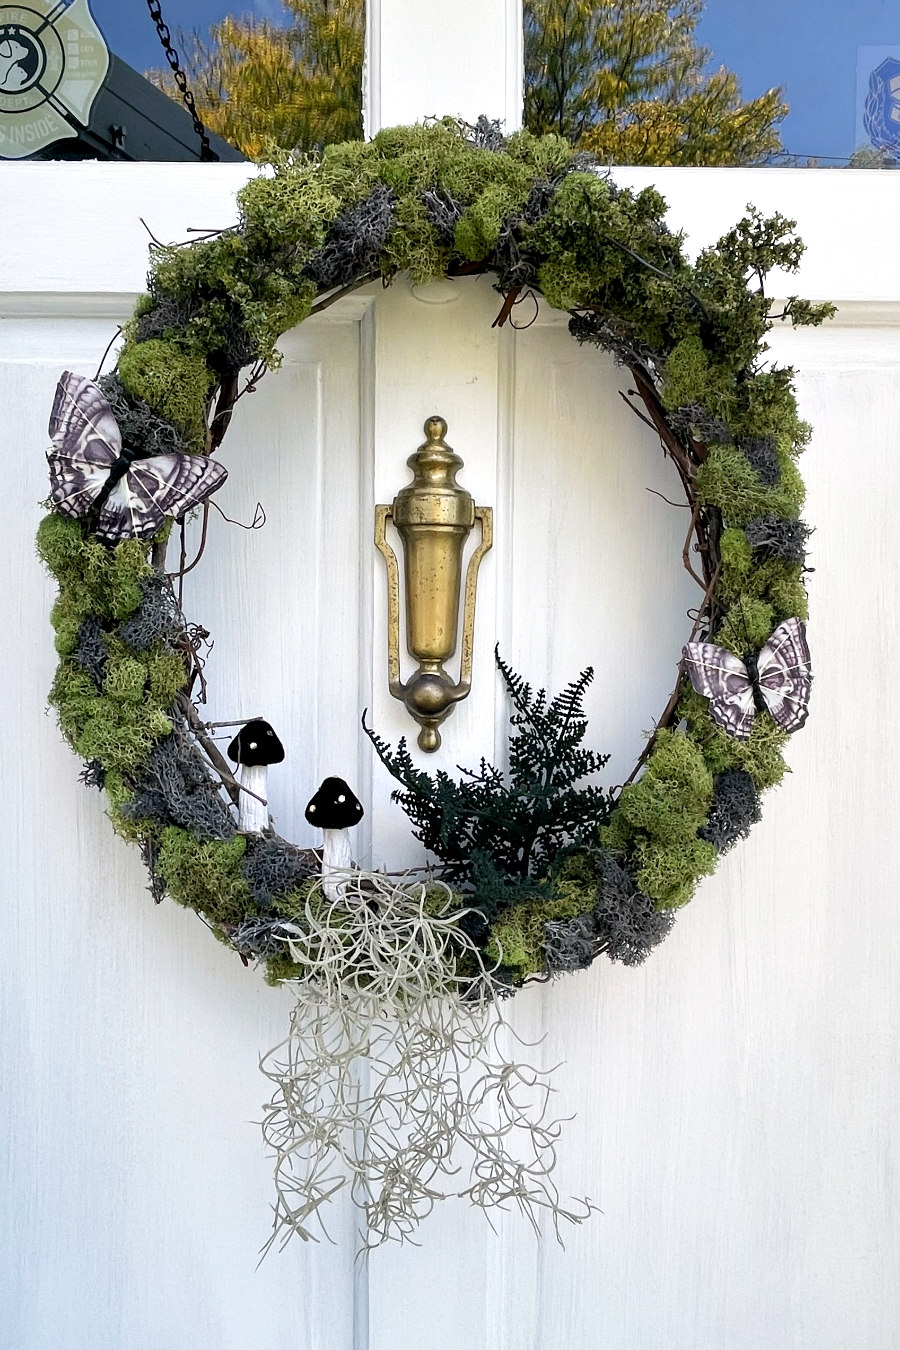
Add a naturally creepy touch to your front door this Halloween with this mossy mushroom wreath made with preserved reindeer moss, greenery, and spooky accents like black mushrooms and skull butterflies.
This post may contain affiliate links. Making a purchase through one of these links helps support this blog.
Our house has been decorated for Halloween for a few weeks already. And while most of the decorations have stayed the same this year, I decided to add more of a spooky woodland vibe to the "Salem cemetery" area of our front yard that's tucked alongside our massive rhododendrons.
Along with some DIY tombstones I made a few years ago, this year I added an owl, a creepy gnome, and scattered some petrified looking bones. I'm hoping to find a nice, plump toad to eventually add as well.
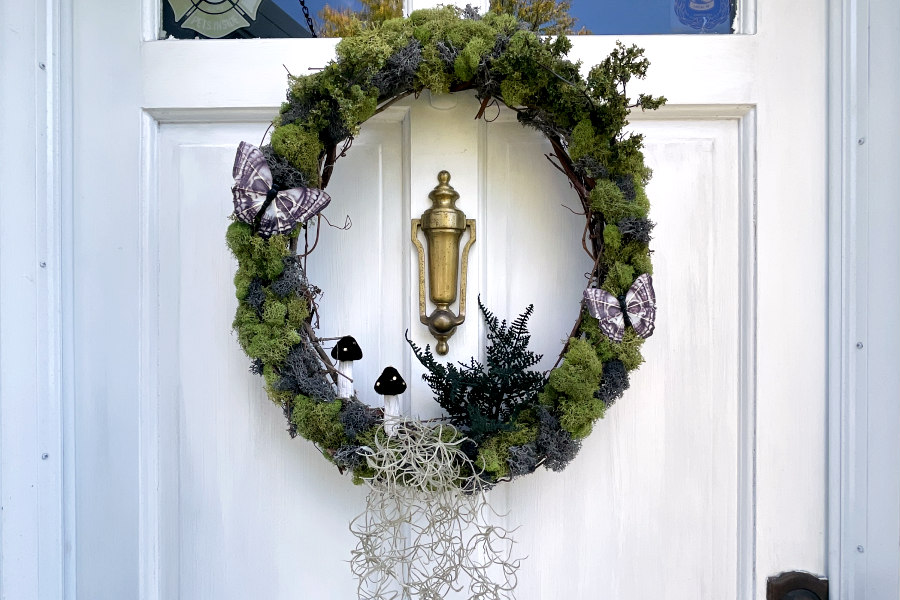
And while the front steps of our house feature more of a classic Halloween vibe, I wanted to change the wreath on our front door this year to reflect that spooky woodland feel. So I hit Michaels for supplies and created a mossy mushroom grapevine wreath.
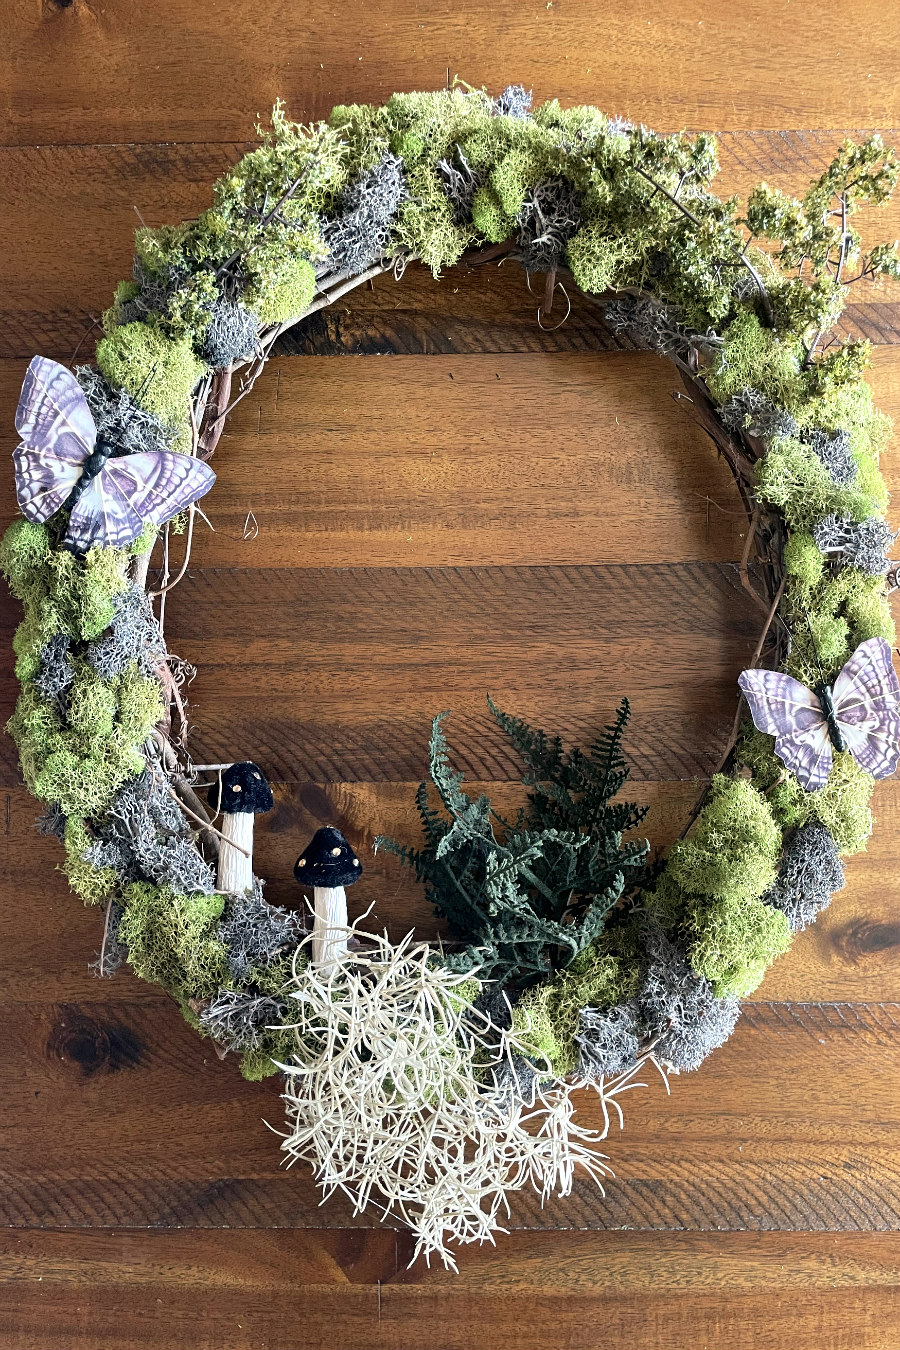
This wreath adds a spooky touch without looking too over-the-top for Halloween. It's simple enough to create with natural touches like preserved moss, dark greenery, and embellishments like black velvet mushrooms and skull butterflies. I thought about spray painting the wreath black, but decided to keep it in its natural state and cover it with the moss to add to the overgrown, woodland feel.
Mossy Mushroom Halloween Wreath
This wreath turned out exactly how I envisioned it! And as someone who loves nature-inspired decor, it definitely added a more natural vibe to my Halloween setup this year. Once I planned out the placement of everything, this wreath came together pretty quickly. Probably because I couldn't wait to hang it up on the door!
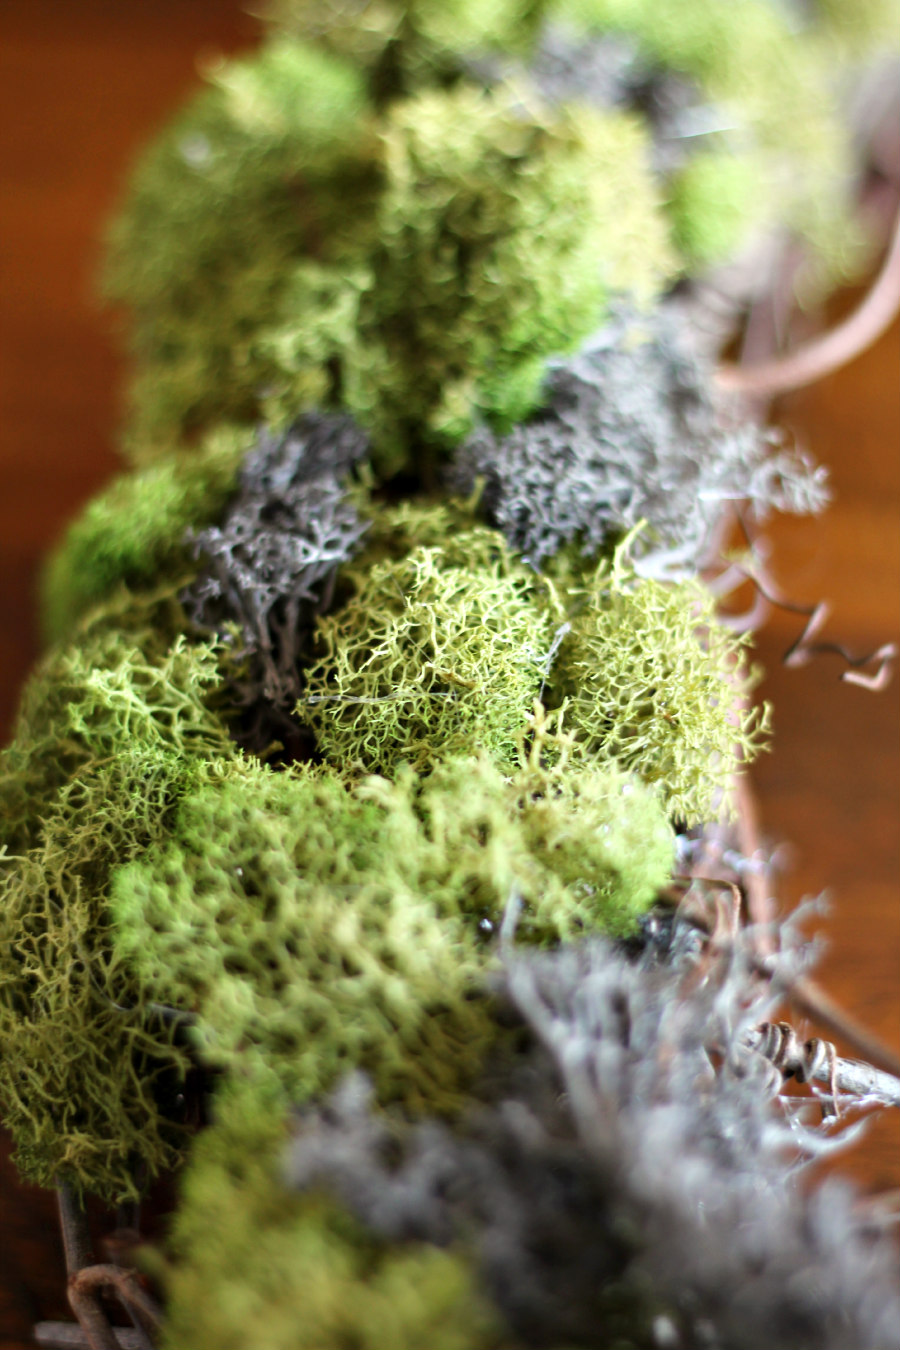
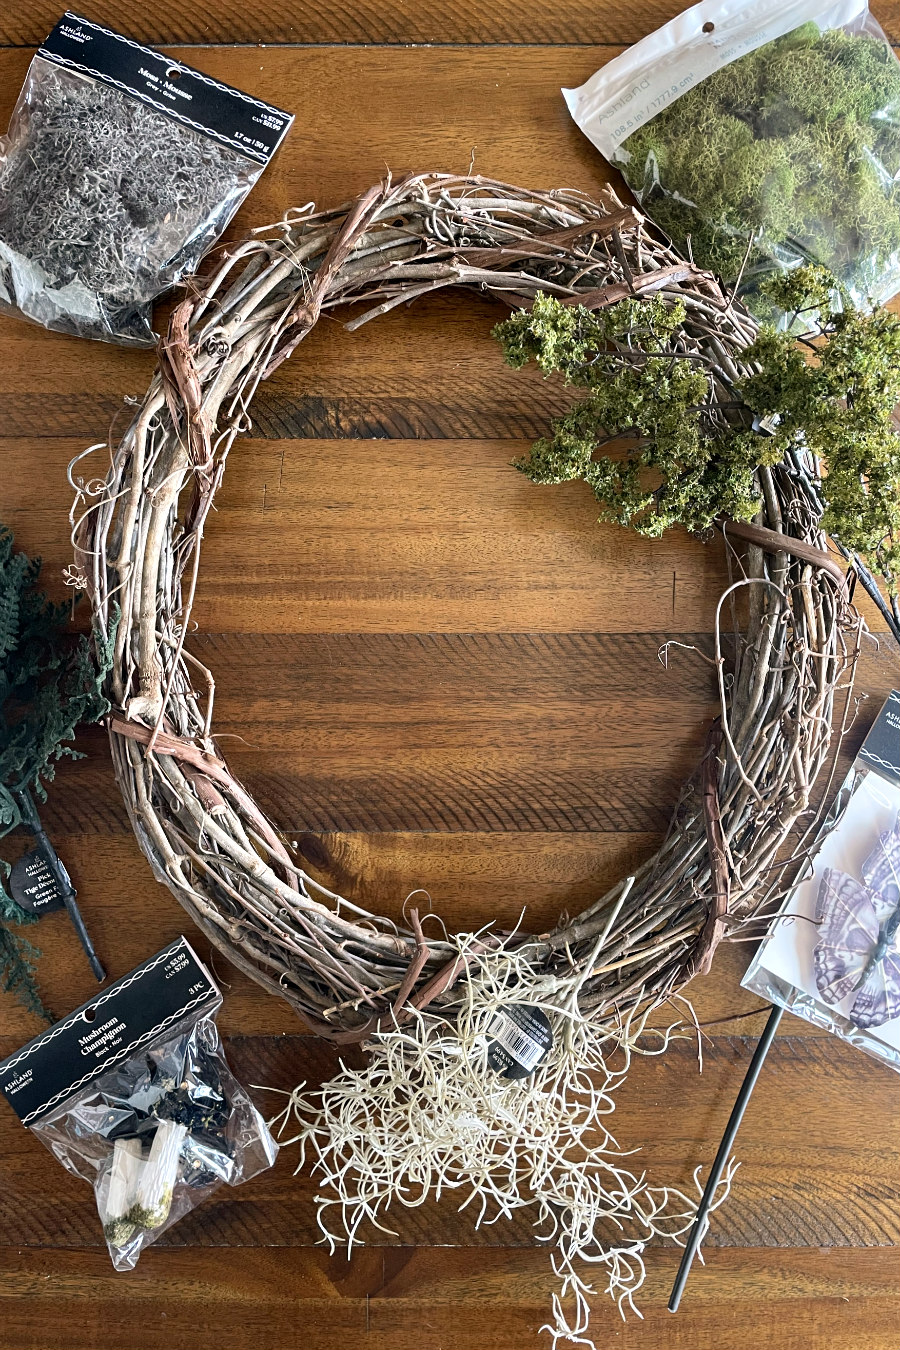
The first thing I always do when I'm making a wreath is plan my placement. Once I have a plan for everything, I'll start gluing the bottom layer of my embellishments in place. In this case, I started adding the moss to the wreath. I used a mix of green and gray moss to give the wreath a spookier look.
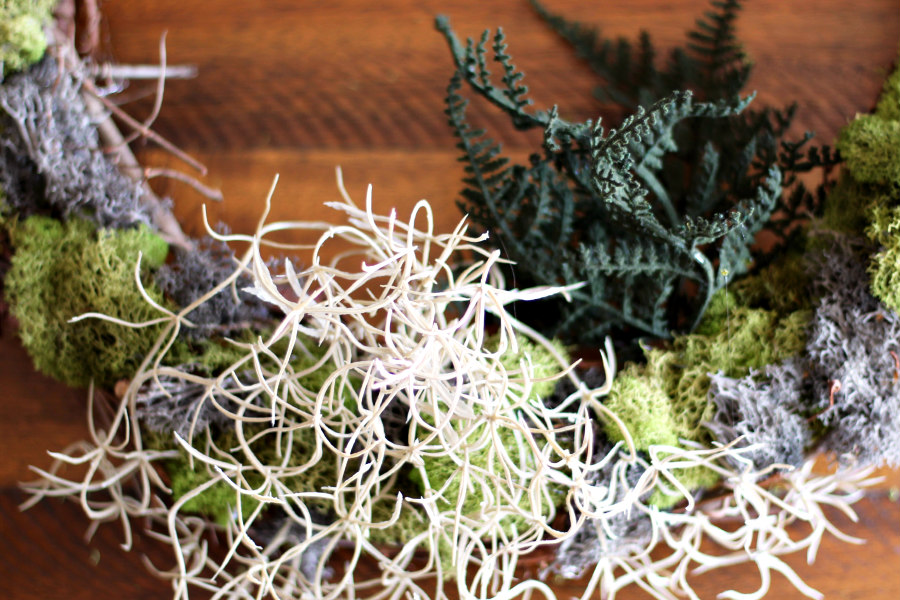
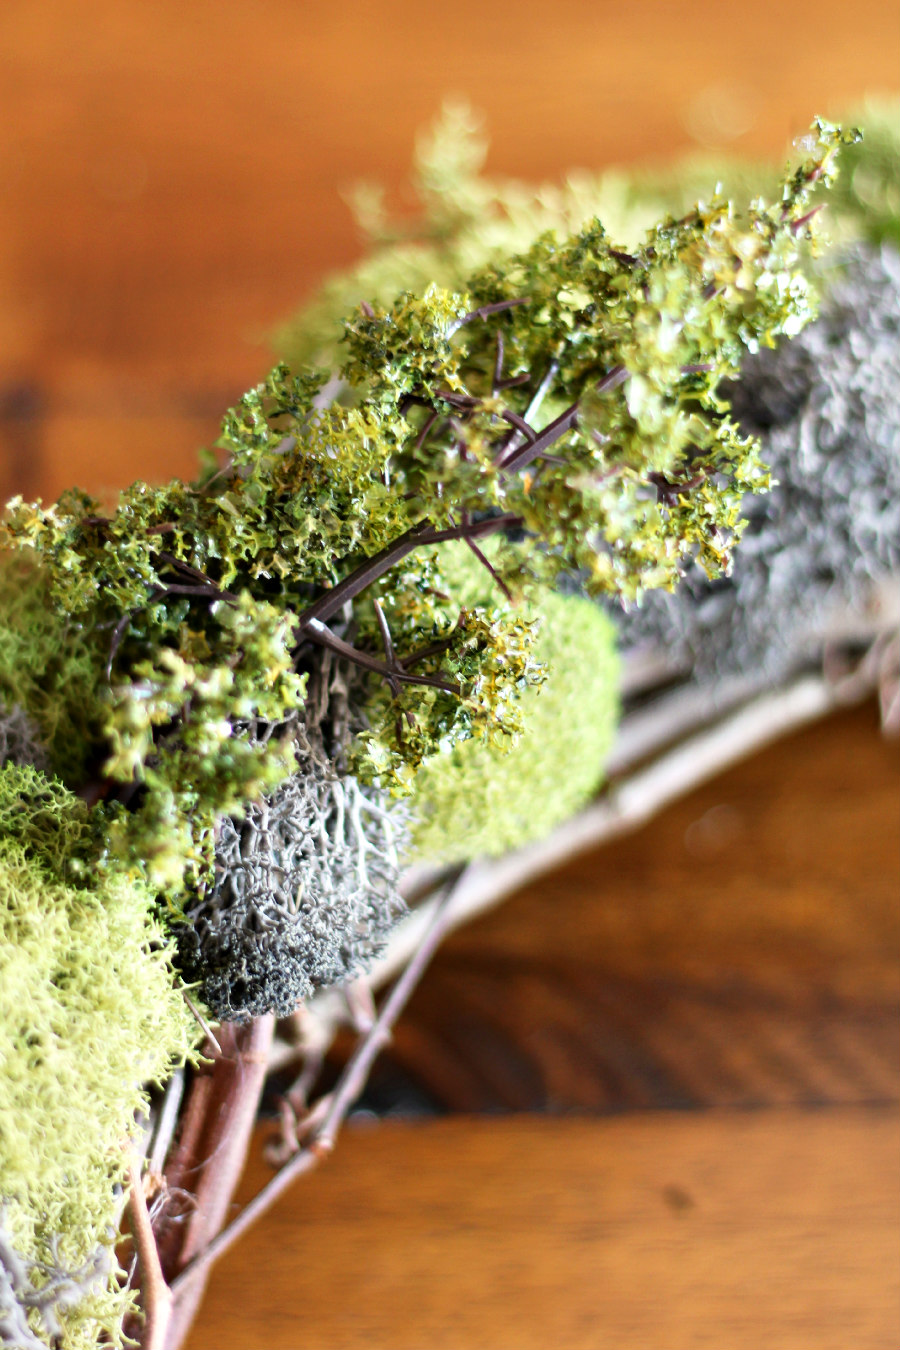
Then, I added the greenery. I wanted the Spanish moss pick to hang over the bottom of the wreath. Then, I added the ferns to the inside of the wreath and the mossy stems to the top half of the wreath.
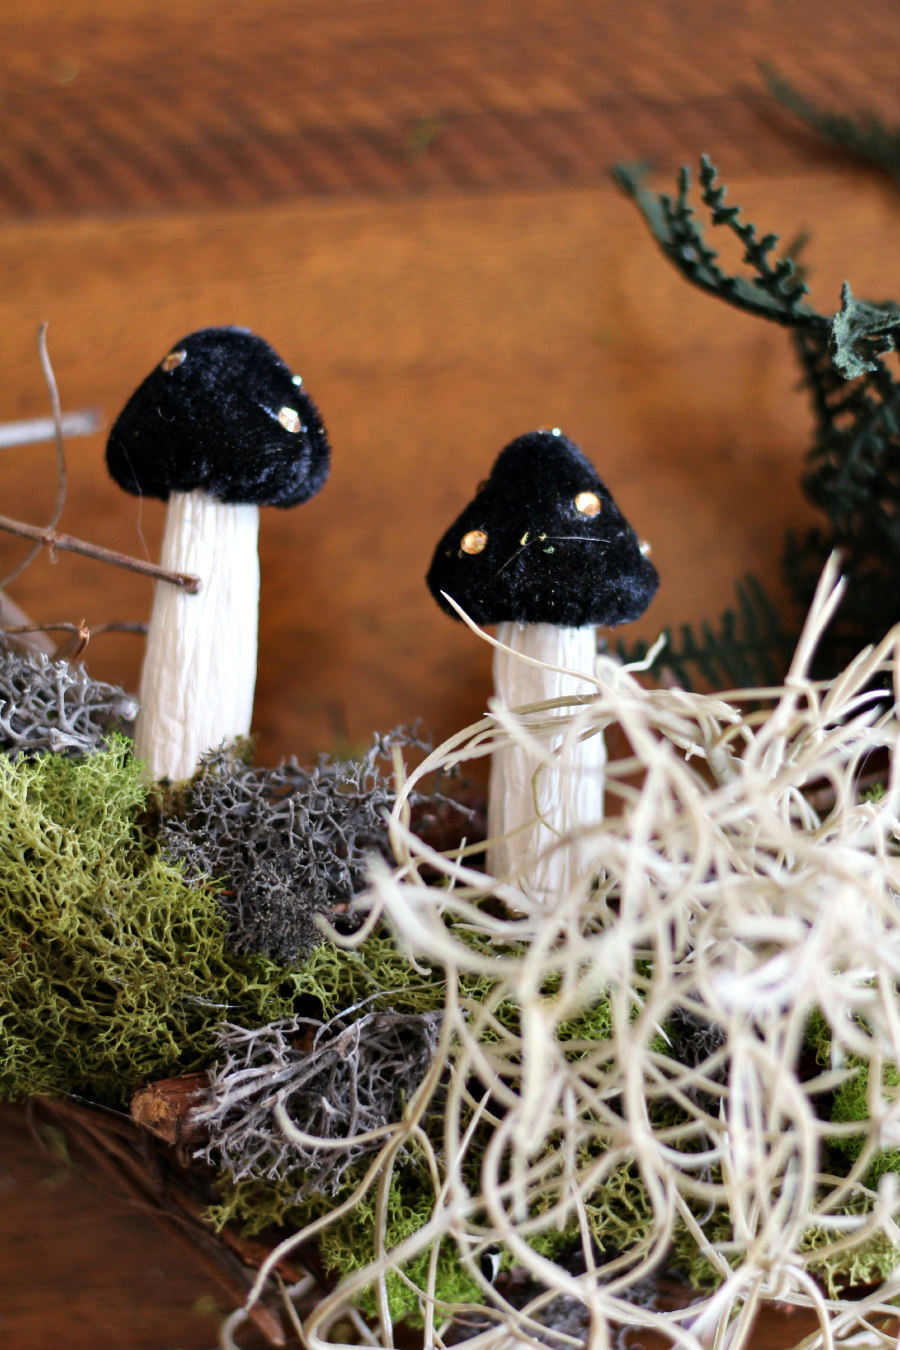
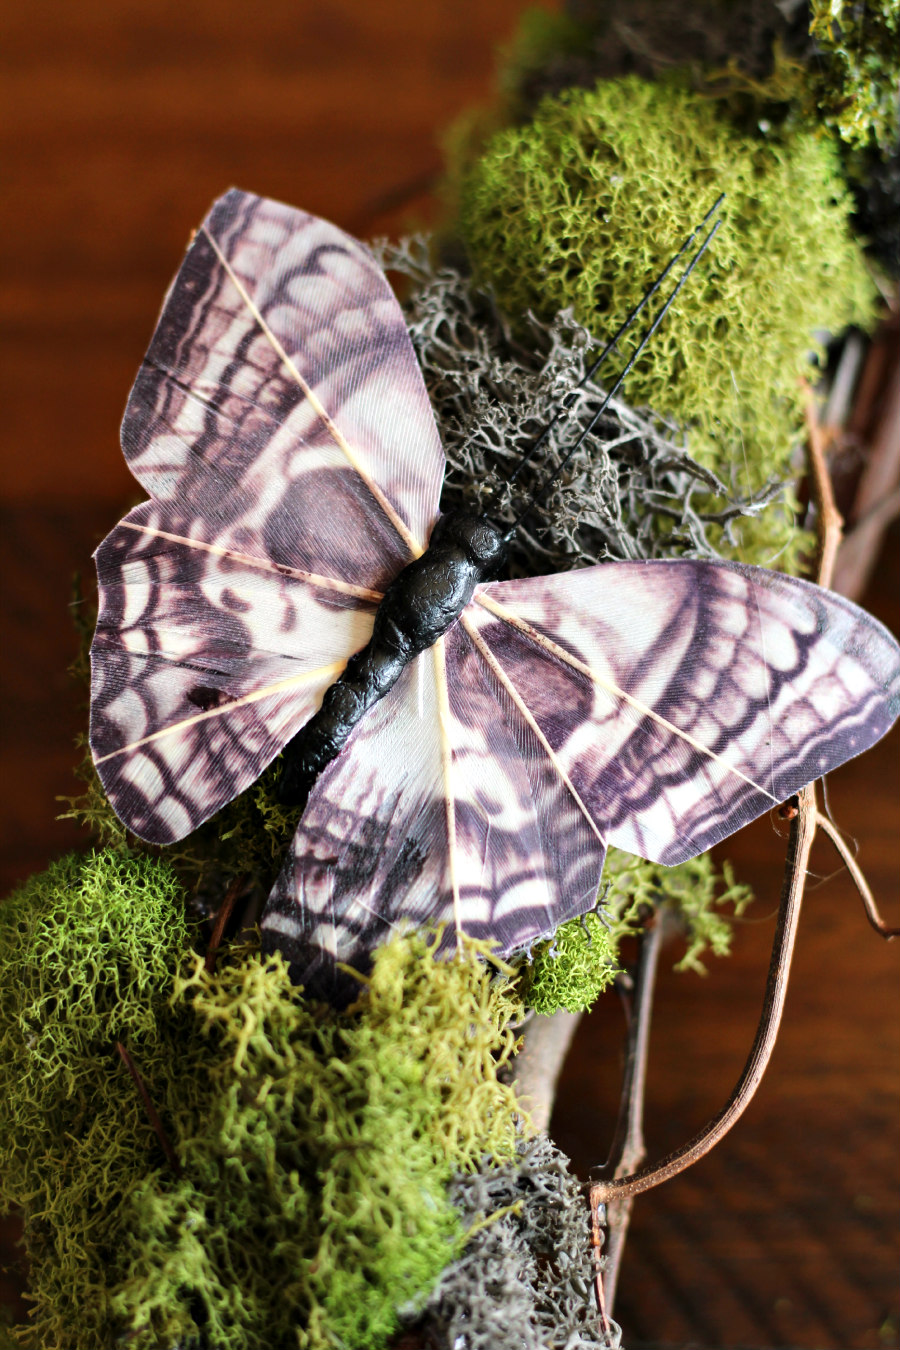
Next, I glued the mushrooms to the inside bottom of the wreath. I finished the wreath by adding the skull butterflies around the outside.
All that was left to do was hang it on the door and admire it!
SUPPLIES
- 18 inch grapevine wreath
- Gray preserved reindeer moss
- Green preserved reindeer moss
- Hanging Spanish moss pick
- Dark green moss stem
- Dark green fern stem
- Black and white skull butterflies
- Black mushroom set
- Hot glue gun + glue sticks
STEPS
- Preheat a hot glue gun. Then, plan the placement of everything being added to the wreath.
- Begin gluing the gray and green moss to the wreath.
- Add the greenery starting with the Spanish moss pick. Glue it to the bottom of the wreath so it drapes over the front.
- Glue the ferns inside of the wreath and mossy stems around the top half of the wreath.
- Glue the mushrooms to the inside bottom of the wreath. Then, glue skull butterflies around the outside of the wreath.
- Allow the glue to dry completely and hang on the wreath on your door.
If you're looking for naturally spooky Halloween decor, let this wreath be your inspiration. It's also quite trendy since earthy textures and, of course, mushrooms are very much "in" this year! If you decide to shop for supplies at Michaels, all of their Halloween picks and accents were between 40 and 60 percent off.
Did you make this Mossy Mushroom Halloween Wreath project? Share it on social media using the hashtag #holokahome. Don’t forget to tag me @holokahome!