Add some rustic charm to your big day with these easy DIY Rustic Stenciled Wedding Signs made with Stencil Revolution wedding stencils!
This post may contain affiliate links. Making a purchase through one of these links helps support this blog.
When my husband and I planned our City Hall wedding in the summer of 2012, I couldn’t wait to be a DIY bride! We were having a small reception the next day in my parents’ backyard. We decorated everything ourselves. I created centerpieces out of lanterns and yellow and lavender florals. At the end of the night, I sent everyone home with favors, including Stamped Lavender Sachets that I had made.
So when my little sister got engaged and started planning her wedding, I was thrilled when she asked me to help with the decorations! I’ve been brainstorming ideas ever since! My sister and her fiancé are getting married this November. They’re having a rustic, fall themed wedding. I’m thinking pumpkins, fall leaves, pumpkins, sunflowers, pumpkins, lanterns, and of course, pumpkins!
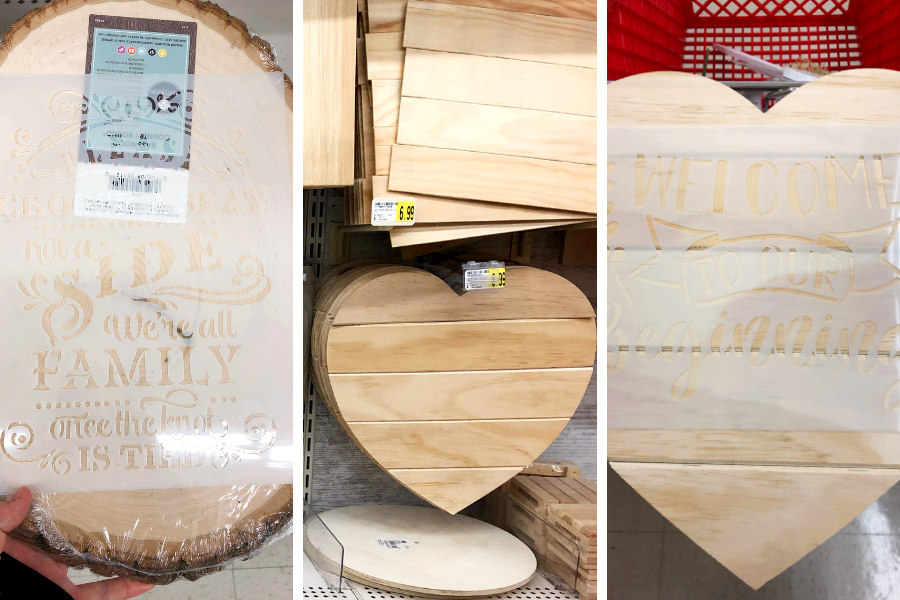
Recently, Stencil Revolution e-mailed asking if they could send me some of their stencils. I knew it was the perfect opportunity to work on some rustic-inspired projects for my sister’s wedding! I had my sister pick out a couple wedding stencils from their website. Then, I headed to the craft store to grab some wooden surfaces to stencil into signs.
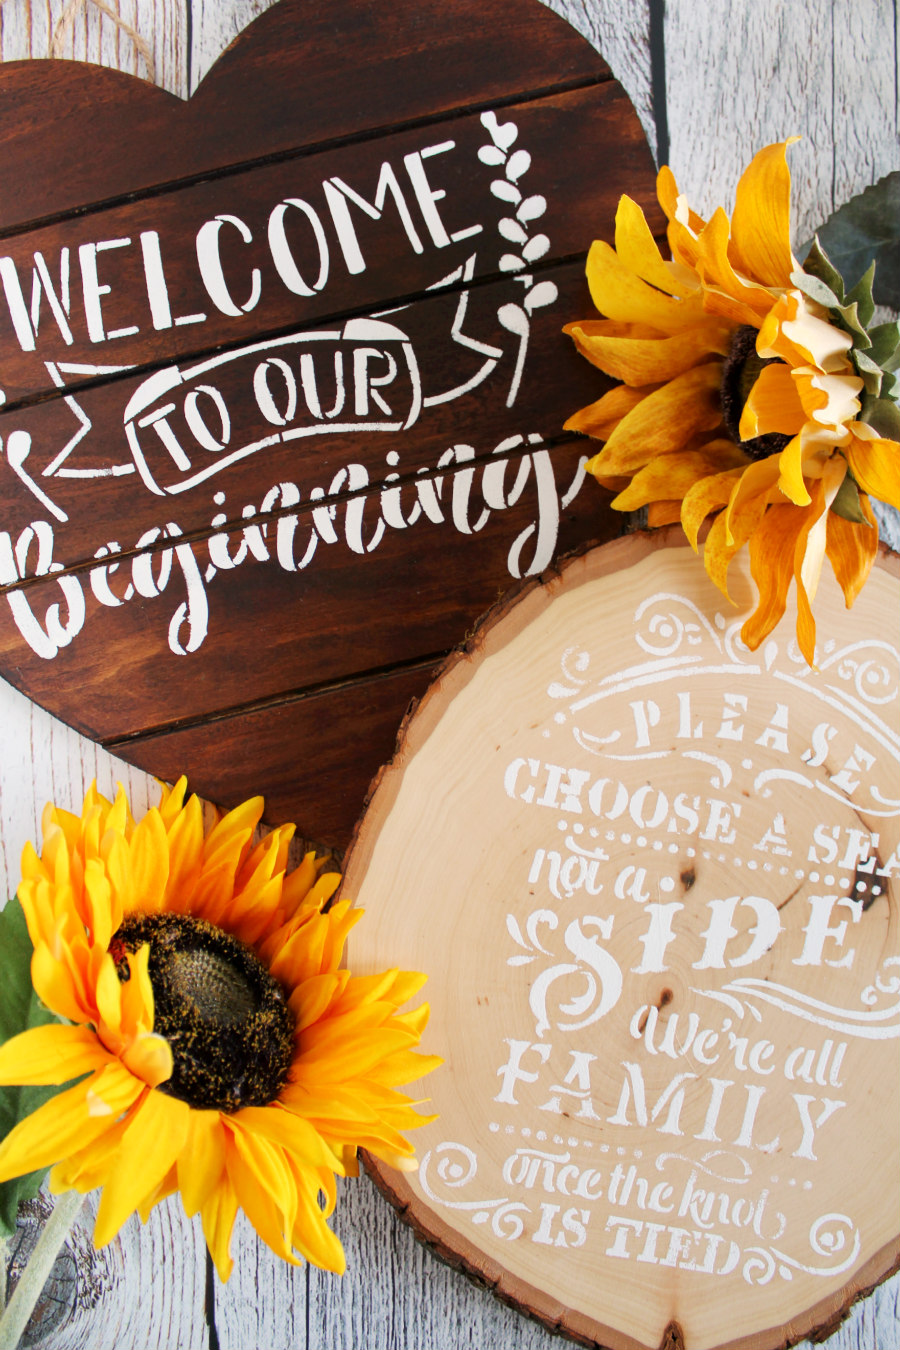
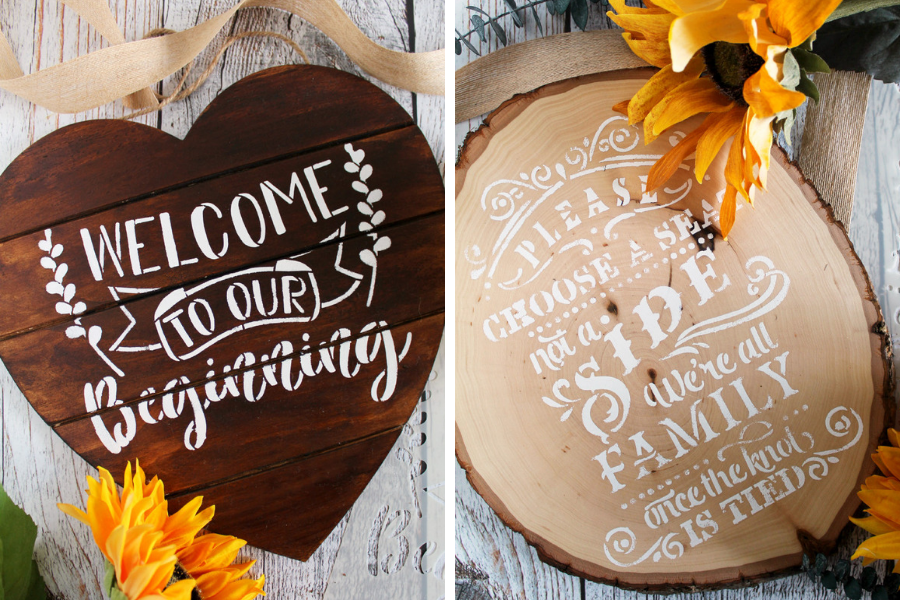
We went with a wood round for one stencil and a wood heart pallet for the other. Stenciling the wood round was quick and easy. We decided to stain the heart pallet in Rust-Oleum®’s Early American. It’s a beautiful stain that’s not too dark and not too light. I did two coats of the stain, let it dry overnight, and then added the stenciling.
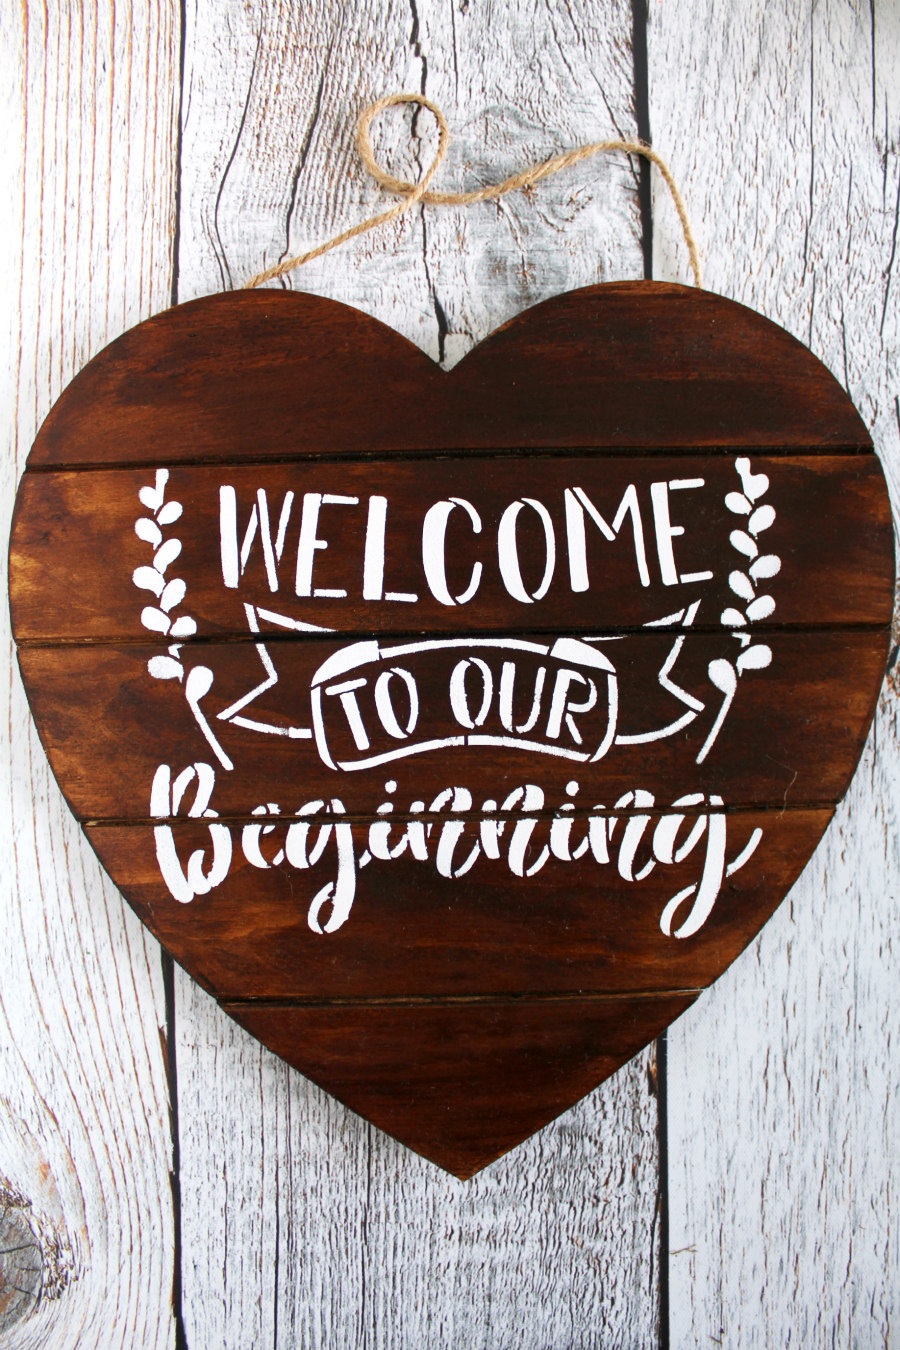
WELCOME TO OUR BEGINNING WOOD HEART PALLET DIY
SUPPLIES
- 14″x14″ wood heart pallet
- Rust-Oleum®’s Early American Wood Stain
- 8.5″x11″ Welcome To Our Beginning Stencil
- Painter’s tape
- Foam pouncer
- Matte white acrylic paint
- Clear spray paint
STEPS
- Throw on some gloves and grab some rags. Then, add a coat of wood stain to the heart pallet. It’s up to you if you want to stain both sides. I didn’t stain the back. Let the stain dry. If necessary, add another coat of stain to deepen the color.
- Once the stain is dry, position the stencil onto the pallet and secure it in place with Painter’s Tape.
- Dip the foam pouncer into white paint, removing excess paint, and begin tapping the paint onto the stencil. If you’re going for a more rustic look, don’t reapply paint so it looks a little worn in spots.
- Allow paint to dry completely. If desired, spray a coat of clear spray paint to protect the stenciling.
- Once the spray paint has dried completely, you’re all set to hang this sign!
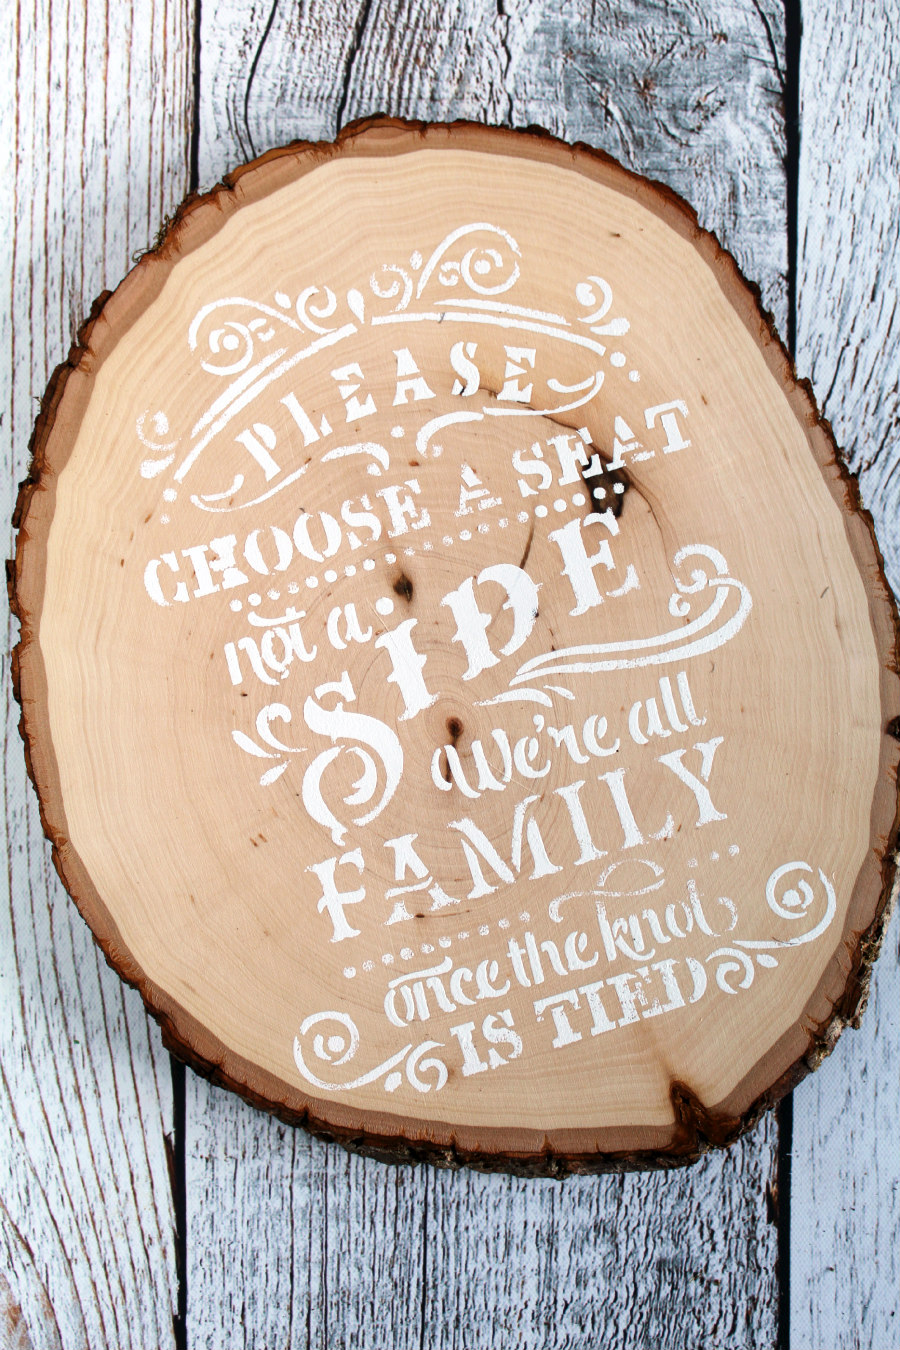
WEDDING FAMILY WOOD ROUND DIY
SUPPLIES
- 9″-11″ wide wood round
- 8.5″x11″ Wedding Family Stencil
- Painter’s tape
- Foam pouncer
- Matte white acrylic paint
- Clear spray paint
STEPS
- Position the stencil onto the wood round and secure it in place with Painter’s Tape.
- Dip the foam pouncer into white paint, removing excess paint, and begin tapping the paint onto the stencil. If you’re going for a more rustic look, don’t reapply paint so it looks a little worn in spots.
- Allow paint to dry completely. If desired, spray a coat of clear spray paint to protect the stenciling.
- Once the spray paint has dried completely, you’re all set to display this sign on an easel!
These stencils were so easy to work with! I was even able to grab a calendar stencil to turn a garage sale chalkboard into a dry erase board! There’s a ton of stencils to choose from on Stencil Revolution’s website.
These stencils were pretty sturdy, easy to clean, and the designs will fit my sister’s wedding theme perfectly! I can’t wait to see these projects in action in November!