
Celebrate the holidays with this limited edition gift wrap set from Darby Smart and Gap. I received this gift wrapping set for design purposes to promote its release. This post may also contain affiliate links. Making a purchase through one of these links helps to support this blog and the new designs I create.

As a Darby Smart designer, I get to share my creativity with a wide audience of fellow makers. I absolutely love creating new projects for my blog and I love being able to share them through Darby Smart as one of their many designers. This holiday season, Darby Smart put a call out to designers to submit gift tag designs. The five most popular designs would be chosen to be a part of a limited edition gift wrapping set sold on Darby Smart and in Gap stores. I submitted a simple Peace on Earth design and a fun Santa Baby design. While I absolutely loved my Santa Baby design, I didn’t have much time to promote either and they lost out among the other designs. Whomp, whomp.
However, I still couldn’t wait to get my hands on this kit! I received the gift wrapping set as an early release and I can honestly tell you that everything included in this kit is so much fun! Some of the supplies will last even after the holidays. So what’s inside? The gift wrapping set includes:
- Baker’s twine
- Silver glitter washi tape
- Silver metallic pen
- Wooden gift tags
- DS designer created paper gift tags
- Kraft wrapping paper
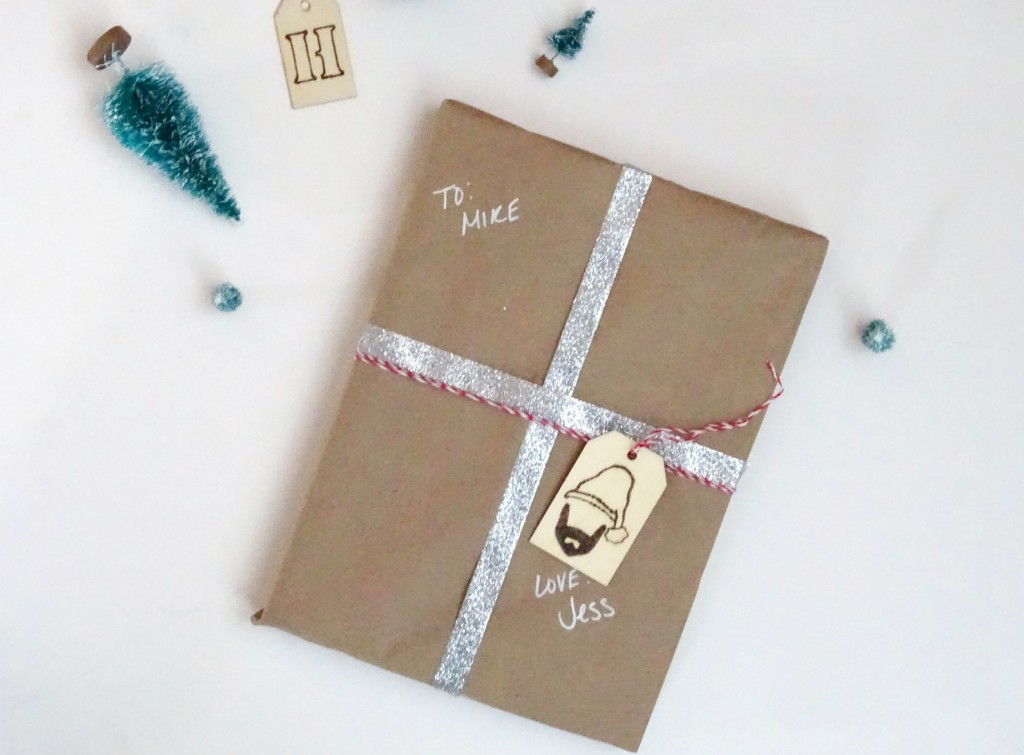
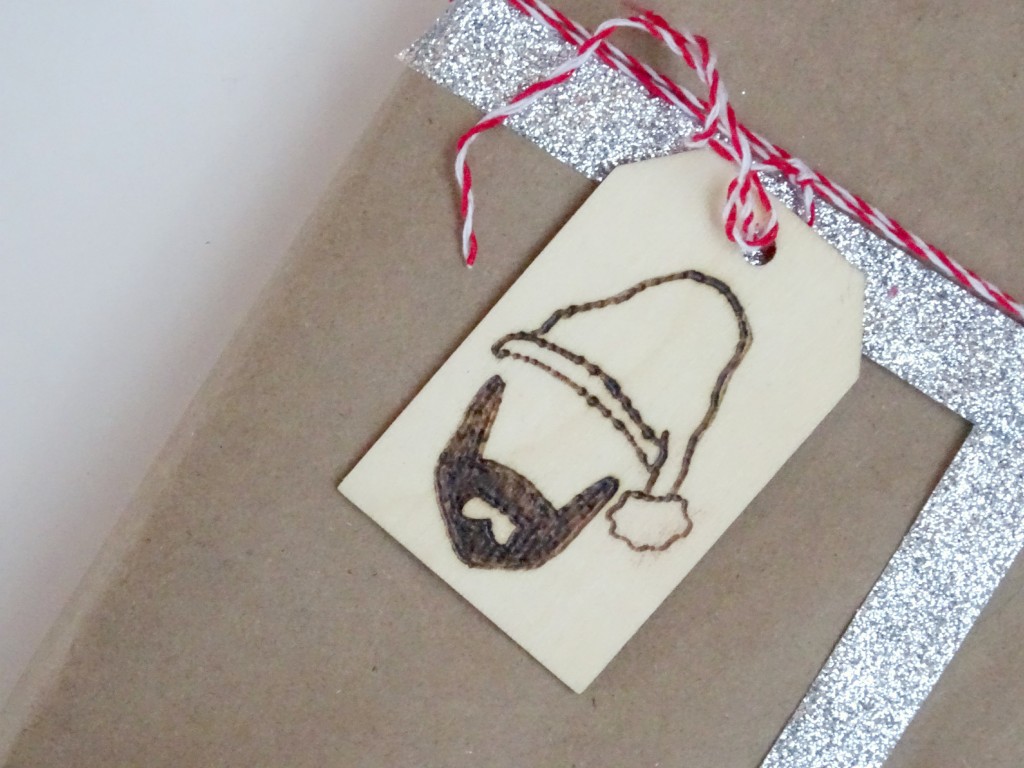
I took the opportunity to get a little gift wrapping done with the set and wrapped my husband’s present. The star of this gift wrap set, in my opinion, is the wooden gift tags. There’s so much you can do with them! Paint them, decorate them with washi tape, color them with your silver metallic pen! I chose to break out my wood burning tool and bring back my Santa Baby design! I also stenciled an “H” on a smaller wooden tag.
To make your own wood burned holiday gift tags, you’ll need:
- Wooden gift tags
- Wood burning tool
- Stencil or printable to trace
- Pencil
- Baker’s twine
- Heat your wood burning tool. While it’s heating up, lightly trace the stencil design onto the wooden tag.
- Use your wood burning tool to go over the traced lines.
- Fill in any spaces you wish with the tool.
- Use baker’s twine to attach the tag to a gift.

The great thing about these holiday gift tags is that once the recipient is finished unwrapping their gift, they can hang the tag on the tree as an ornament! Cute, right?
No Comments