Before you deck the halls, deck out your Thanksgiving table with these easy DIY Wood Slice Thanksgiving Turkeys.
This post may contain affiliate links. Making a purchase through one of these links helps to support this blog.
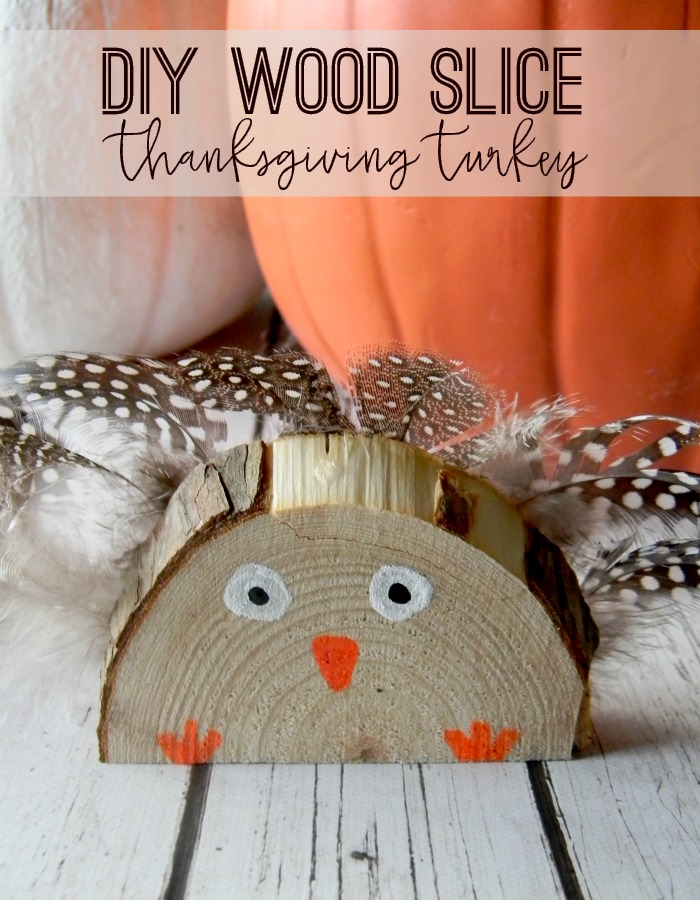
I figured that before I go completely into Christmas overdrive with holiday DIY projects and recipes, I should share at least one more Thanksgiving project. Over the weekend, I worked on some wood slice projects. I had a package of pretty feathers just begging to be used, so I put the wood slices and feathers together to create the cutest little Thanksgiving turkeys ever! These are so easy to make and would look adorable placed around your Thanksgiving table!
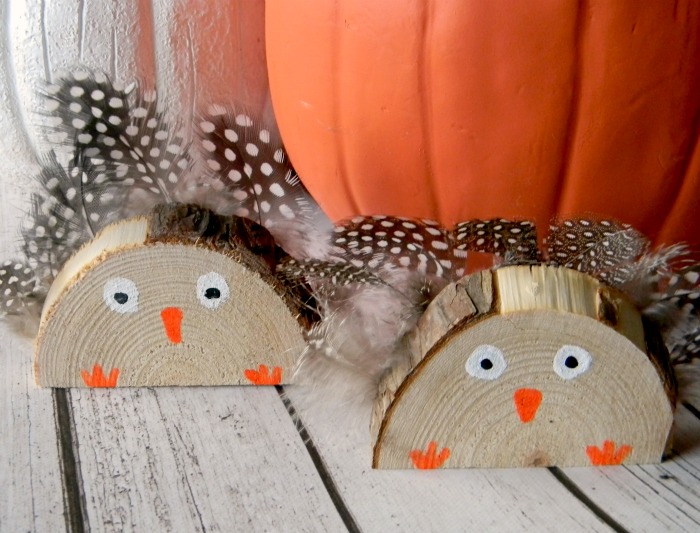
Between Halloween and the holidays, the house is usually a blank slate before Christmas makes its obvious reappearance. This year, I decided to do a little decorating for Thanksgiving with some Fall florals, festive pumpkins, and of course, these little guys. I love adding a rustic touch to my decor and these little wood slice turkeys do just that!
Once you get your wood slices cut in half (I had my helpful husband do it for me with a hand saw), all you have to do is glue on some feathers and paint on a turkey face. These are so simple and so cute that you might even want to make several and let your Thanksgiving guests take one home!
SUPPLIES
- Wood slice
- Paint
- Feathers
- Glue
STEPS
1. Carefully cut your wood slice in half.
2. Arrange your feathers on one side of the wood slice, then glue.
3. On the other side of the wood slice, use white paint to make eyes. Dot them with black paint. Then, add a beak and feet with orange paint.
4. Allow paint to dry completely and display your Thanksgiving turkey! Gobble, gobble!
Did you make this DIY Wood Slice Thanksgiving Turkey project? Share it on social media using the hashtag #holokahome. Don’t forget to tag me @holokahome!

These are so cute! We just started the Whisk It Wednesday link party and I thought you might be interested in sharing there too! Thanks, Carrie
Thanks so much!
so cute and different!
b
Thank you!
Oh my goodness, these are so stinkin' cute!!!
Thanks so much!
OMG!! Adorable. Thanks for linking up to More the Merrier Monday. Can’t wait to see what you’ll be linking up next week.
DIY Home Sweet Home
http://www.diyhsh.com
Thanks so much! So glad you like this DIY project!